Android FlexboxLayout Tutorial with Example
http://www.viralandroid.com/2016/05/android-flexboxlayout-tutorial-with-example.html
FlexboxLayout is a new android library which was introduced by Google in many 2016. This new library project was pushed to the official Google GitHub repository. FlexboxLayout is an android layout manager which brings the similar capabilities to the CSS Flexible Box Layout Module. In this tutorial, you will learn to implement this FlexboxLayout library in your android project and we will create some example using flexbox layout.
FlexboxLayout extends the ViewGroup like android relative layout and linear layout. You can add different attributes to the flexbox layout like flexDirection, flexWrap, justifyContent, alignItems and alignContent. There are other many attributes that you can add to your child view of a FlexboxLayout.
Related:
How to Add a Library Project to Android Studio
Android Layouts Tutorial
Android Material Design Sliding Tabs Example
Create a new android project with the project name Android FlexboxLayout, open build.gradle file and add compile 'com.google.android:flexbox:0.1.3' dependency. Your build.gradle file will look like below.
build.gradle
FlexboxLayout is similar to the LinearLayout because it positions it’s children sequentially. Each child is placed one after another.
Let’s talk about different flexbox layout attributes.
flexDirection
This attribute determines the direction of main axis. It has different variables, they are: row, row_reverse, column and column_reverse.
flexWrap.
This attribute helps to control the behavior whether the flex container is in single line or multi line as well as direction of cross axis. It has three different variables, they are: wrap, wrap_reverse and nowrap.
justifyContent
This is another important attribute which control the alignment along with the main axis. There are five possible variables, they are: space_between, space_around, flex_start, flex_end and center.
alignItems
This attribute controls the size and position of the items along with the cross axis. There are also five possible variables of anignItems attribute, they are: stretch, center, baseline, flex_start and flex_end.
alignContent
alignContent attribute controls the alignment of flex line in the flex container. There are six possible variables, they are: stretch, center, space_between, space_around, flex_start and flex_end.
There are some other attributes which you can add to the child view of flexbox layout. Attributes for child view of FlexboxLayout are: layout_order, layout_flexGrow, layout_flexShrink, layout_alignSelf and layout_flexBasisPercent.
Create a new XML layout file flexbox_layout1.xml and add com.google.android.flexbox.FlexboxLayout layout with the attributes app:alignContent, app:alignItems, app:flexDirection and app:flexWrap. Inside FlexboxLayout add some TextView with app:layout_alignSelf attribute. Following is the complete content of flexbox_layout1.xml file.
res/layout/flexbox_layout1.xml
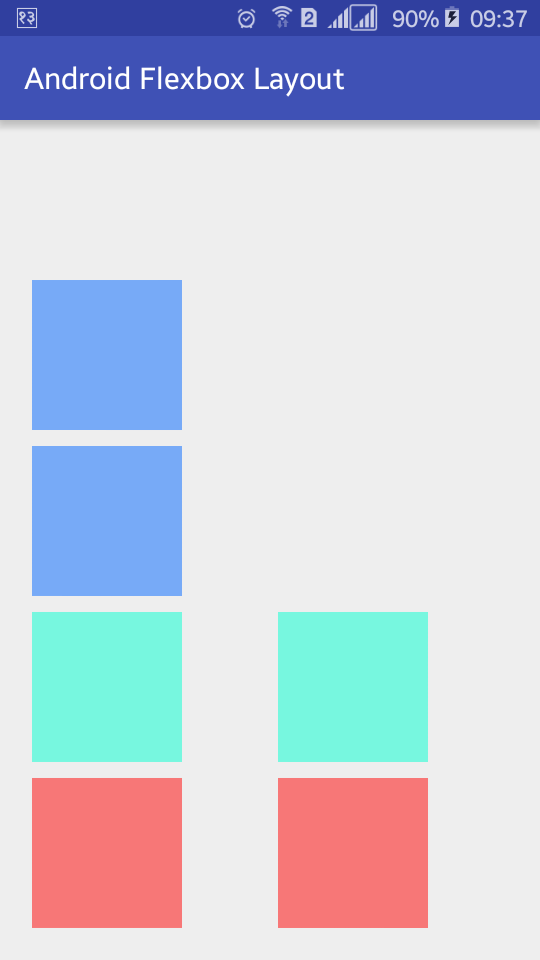
Output of above code
Similarly create two XML layout file flexbox_layout2.xml and flexbox_layout3.xml and add the following XML code.
res/layout/flexbox_layout2.xml
Output of above code
res/layout/flexbox_layout3.xml
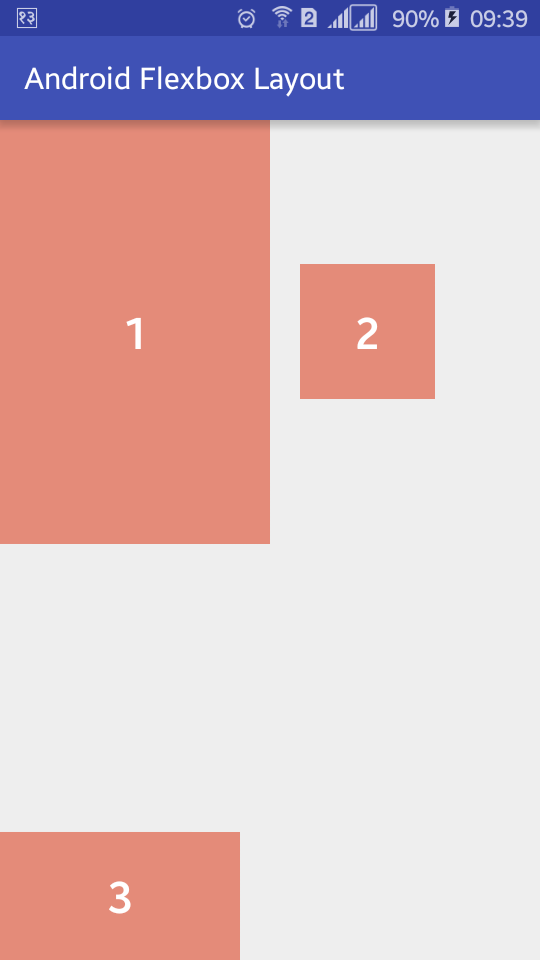
Output of above code
Now create three java file FlexboxLayoutExampleOne.java, FlexboxLayoutExampleTwo.java and FlexboxLayoutExampleThree.java. Following is the default code of these java activity file.
src/FlexboxLayoutExampleOne.java
src/FlexboxLayoutExampleTwo.java
src/FlexboxLayoutExampleThree.java
Open your main XML layout file and add three buttons with onClick attributes. Your main XML layout file will look like below.
res/layout/activity_main.xml
Similarly, open your main java activity file and add the following code.
src/MainActivity.java
Now open your app AndroidManifest.xml file and add the three activities name inside application tag .FlexboxLayoutExampleOne, .FlexboxLayoutExampleTwo and .FlexboxLayoutExampleThree. Android manifest file will look like below.
AndroidManifest.xml
Run your Android Flexbox Layout Example application and click the different buttons which will look like above screenshots. You can download the complete example source code from GitHub.
FlexboxLayout extends the ViewGroup like android relative layout and linear layout. You can add different attributes to the flexbox layout like flexDirection, flexWrap, justifyContent, alignItems and alignContent. There are other many attributes that you can add to your child view of a FlexboxLayout.
Related:
How to Add a Library Project to Android Studio
Android Layouts Tutorial
Android Material Design Sliding Tabs Example
Android Example: How to Use FlexboxLayout Android Library
Create a new android project with the project name Android FlexboxLayout, open build.gradle file and add compile 'com.google.android:flexbox:0.1.3' dependency. Your build.gradle file will look like below.
build.gradle
FlexboxLayout is similar to the LinearLayout because it positions it’s children sequentially. Each child is placed one after another.
Let’s talk about different flexbox layout attributes.
flexDirection
This attribute determines the direction of main axis. It has different variables, they are: row, row_reverse, column and column_reverse.
flexWrap.
This attribute helps to control the behavior whether the flex container is in single line or multi line as well as direction of cross axis. It has three different variables, they are: wrap, wrap_reverse and nowrap.
justifyContent
This is another important attribute which control the alignment along with the main axis. There are five possible variables, they are: space_between, space_around, flex_start, flex_end and center.
alignItems
This attribute controls the size and position of the items along with the cross axis. There are also five possible variables of anignItems attribute, they are: stretch, center, baseline, flex_start and flex_end.
alignContent
alignContent attribute controls the alignment of flex line in the flex container. There are six possible variables, they are: stretch, center, space_between, space_around, flex_start and flex_end.
There are some other attributes which you can add to the child view of flexbox layout. Attributes for child view of FlexboxLayout are: layout_order, layout_flexGrow, layout_flexShrink, layout_alignSelf and layout_flexBasisPercent.
Android Flexbox Layout Example
Create a new XML layout file flexbox_layout1.xml and add com.google.android.flexbox.FlexboxLayout layout with the attributes app:alignContent, app:alignItems, app:flexDirection and app:flexWrap. Inside FlexboxLayout add some TextView with app:layout_alignSelf attribute. Following is the complete content of flexbox_layout1.xml file.
res/layout/flexbox_layout1.xml
Output of above code
Similarly create two XML layout file flexbox_layout2.xml and flexbox_layout3.xml and add the following XML code.
res/layout/flexbox_layout2.xml
Output of above code
res/layout/flexbox_layout3.xml
Output of above code
Now create three java file FlexboxLayoutExampleOne.java, FlexboxLayoutExampleTwo.java and FlexboxLayoutExampleThree.java. Following is the default code of these java activity file.
src/FlexboxLayoutExampleOne.java
src/FlexboxLayoutExampleTwo.java
src/FlexboxLayoutExampleThree.java
Open your main XML layout file and add three buttons with onClick attributes. Your main XML layout file will look like below.
res/layout/activity_main.xml
Similarly, open your main java activity file and add the following code.
src/MainActivity.java
Now open your app AndroidManifest.xml file and add the three activities name inside application tag .FlexboxLayoutExampleOne, .FlexboxLayoutExampleTwo and .FlexboxLayoutExampleThree. Android manifest file will look like below.
AndroidManifest.xml
Run your Android Flexbox Layout Example application and click the different buttons which will look like above screenshots. You can download the complete example source code from GitHub.


